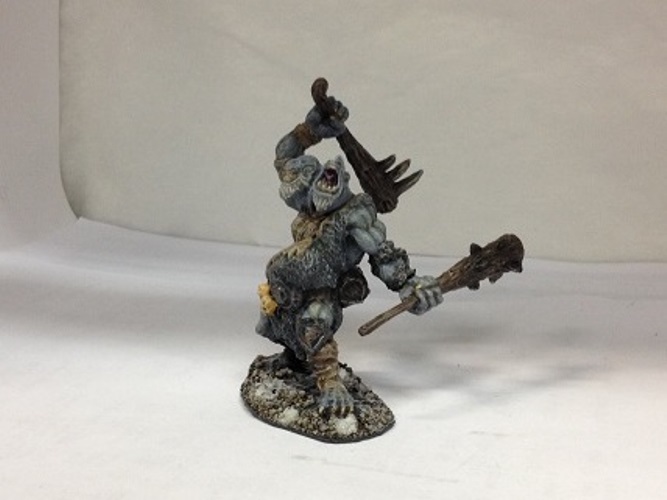
Here’s the last mini from my recent batch of Reaper Bones goodness:
an Ettin which I will use as a two-headed troll (see the bestiary in ‘Into the
Breeding Pits’)
Someone on the Frostgrave Facebook page recently asked me
how I do my photos, so I thought I’d vaguely detail the process here.
Software used:
MS Paint – usually bundled in with all versions of Windows
Picasa – a great photo editing tool which sadly is no longer
available
Windows Live Photo Gallery – again bundled in with Windows
Essentials and again, no longer supported
GIMP – a very useful photo editing program
Step 1: Make a
graduated background (you only need to do this once)

For this, make a blank ‘picture’ in MS Paint or something
similar – literally a blank white rectangle the same size as what you want your
finished article to be.
Save it and then open it in Picasa Photo Viewer and then
select Edit in Picasa. Note Picasa is no
longer supported so you might have to find a similar program to do this.

Select the third tab along and click Graduated Tint. Choose
your colour and fiddle with the settings until you get the effect you want.
Save this picture as your main background.
You might be able to find a nice background picture on the internet
if you don’t want to bother with all of the above!
Step 2: Take photos
of your model

There are loads of guides on the internet about
photographing miniatures. Below is a link to one from Annie of Bad SquiddoGames, if only because she’s awesome and it’s an excuse to link to her new
website.
By necessity I have to take my photos indoors, under
fluorescent light. FYI I use my iPhone camera (again there are loads of iPhone
photography guides online).
Take the photos in front of a blank background, a curved
sheet of white card for example. Or you could knock up a rough and ready light
box like mine (made from a metal file box lined with paper).

Make sure that your camera is focusing on the model. If
need be take plenty of shots and choose the best ones.
Step 3: Put the
photos onto your computer
This will depend on what you used to take the photos and
what device you are using to edit them.
Step 4: Crop the
photo

Once again I use Picassa for this, but you could just as
easily use MS Paint or a host of other photo editing programs and apps.
Crop the photo so that the model is roughly in the centre. Leave a reasonable amount of blank space around the model so that
it’s not ‘in your face’. Save the photo.
Step 5: Resize the
photo

Resize the photo to the same size as your background photo
(see step 1). It doesn’t have to be exactly the same size, just somewhere near.
For lots of photos I use Windows Live Photo Gallery, as I can batch resize
multiple photos with this (though it does save them as separate files rather
than overwriting the originals).
Step 6: Select the model
Open the photo in GIMP. You need to select (or ‘cut around’)
the model. I do this in several stages:
1 – Roughly select around the model using the Free Select
‘lasso’ tool. This ensures that most of the background shadows and such are cut
out. It's difficult to see in the photo, but I've basically used the lasso tool to draw a shape around the model.

2 – Click ‘Select’ menu and then ‘Invert’.
3 – Use the Fuzzy Select ‘magic wand’ tool to select around
the model. Change the settings (feathering etc.) to suit. Make sure the ‘Add to Current Selection’ option is on.
It's difficult to see in the photo, but I've clicked the magic wand tool on all the unselected bits of background around the model.
It's difficult to see in the photo, but I've clicked the magic wand tool on all the unselected bits of background around the model.

Keep using the magic wand tool until there’s a shimmering
line tight around the model (this includes gaps between legs etc.)
4 - Click ‘Select’ and then ‘Invert’.
All being well you should have only the model selected and
no bits of background.
Step 7: Fiddle with
the model

With the model selected you can now fiddle with it to make
it look better.
You can adjust the lightness and contrast (under the
‘Colors’ menu), sharpen the image (Filters – Enhance – Sharpen) and generally
titivate it until you think it looks right.
There are plenty of GIMP tutorials online.
Step 8: Copy and
paste the model onto the background
On your selected model, click ‘Edit’ and then ‘Copy’.
Then open your background photo and select ‘Edit’ and
‘Paste’.
Use the ‘Move’ tool and ‘Scale’ tool to move and resize the
model as you see fit.
Step 9: Save the
finished product
That’s it!
Now got to ‘File’ and ‘Export’ to save your nifty new photo. Upload to a good image hosting service (I use Photobucket) and then copy the associated URL to link to your blog/forum thread.
No comments:
Post a Comment