Monday 27 February 2017

Thaddeus Daemoncall’s Field Trip

l

“Y’know, it’s just like the old days at the College…”

Johannes Oddleigh looked sideways at his master – it was the first time Thaddeus Daemoncall had mentioned the College of Magicke since his exile from those hallowed halls.

“Er, how d’you mean master?”

“Going on a field trip like this – proper research as opposed to rooting around for spell books and such.”

“Aye, I suppose it is…” the apprentice sighed. Field trips at the College never involved hunting down a massive slab of living granite that could pummel you into a bloody mist with it’s huge fists within seconds…

They had followed the trail of destruction to what was once an extensive pleasure garden of some sort. Crushed masonry lay scattered around the frozen ground amongst thick stone walls with massive holes punched through them. Pieces of smashed statues were strewn around in a grim mockery of the once-living examples they had recently had to sift through.

Suddenly a grating roar tore through the air. Past the ruined stonework they could just make out something large, noisily bashing it’s way along a random path of devastation.

“I hope you have your notebook boy,” chuckled the Summoner, before taking a swig from a small bottle and promptly disappearing…

On to part two of the Hunt for the Golem mini-campaign: the Field Research scenario. Thaddeus and his rival Lady Katherine must get close enough to study the Granite Golem, but avoid it’s tremendous wrath and leave it intact for future use.

I spread my warband along the board (well, mat) edge, with Oddleigh and chums on the right flank, his master Thaddeus in the centre with the bulk of the force and the slower, more heavily armoured warriors on the left.

Both warbands move forward cautiously, taking whatever cover they can find among the low walls and statues of the former garden. Halfinch the thief reaches a treasure chest and reaches out to grab it.

But it disappears! “Damn fool’s gold!” The Hobbit grumbles. Thaddeus, spying the monster up ahead, readies himself to get closer by drinking an invisibility potion. Hopefully the beast will vent it’s fury on Lady Katherine’s band rather than his.

Using a wall as cover, Lady Katherine’s apprentice moves forward on the right, accompanied by a warhound. Oddleigh sends Fluffy up to meet them before leaping up the barbarian in support.

Behind Lady Katherine’s lines an imp appears, attracted by the noise. Her Captain is on hand to splatter the critter back from whence it came.

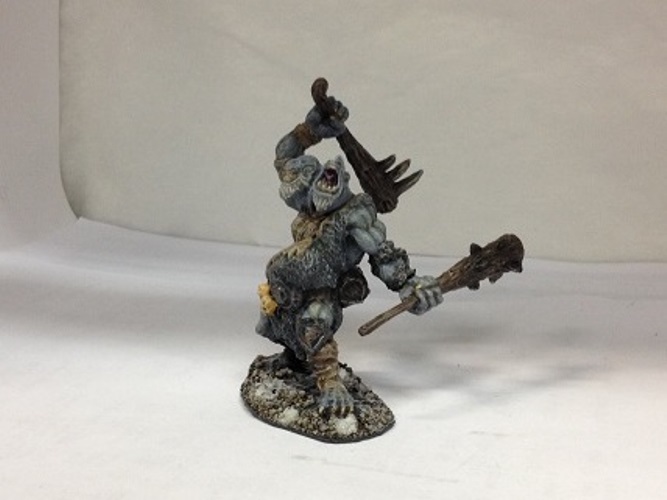
The Granite Golem looks up from it’s destruction and roars angrily at the warbands. Who will it attack? Both bands had soldiers equidistant from the monster, so we rolled for it. Luckily for me it was an opposing ranger (carrying treasure to boot) that would feel the beast’s fury.

I knew that the leapt barbarian wouldn’t regain his composure in time to stop the opposing apprentice casting a spell, so Oddleigh decided to try mind controlling the enemy pooch. It worked, and before his opposite number could make a swift exit, Oddleigh had the controlled beast intercept her.

The barbarian looked on, confused as the warhound attacked it’s mistress. Unfortunately for her I rolled a 20. She goes down to the critical hit.

This left Fluffy to move towards the enemy, who were already moving back after wounding Halfinch and beating him to a treasure token. Fluffy also gets wounded but continues to advance.

Captain, knight and marksmen clank slowly up the left flank. With Lady Katherine’s band pulling back, it’s unlikely that they’ll make contact, but at least it keeps the pressure on.

Wounded Fluffy sees off an enemy soldier (another crit). By now an invisible Thaddeus has been able to study the Golem and only needs to cast a non-harmful spell on it to gain some more experience. However, before he can do that, disaster strikes…

The enemy ranger kills the Golem! The hulking brute had been swatting ineffectively at the ranger for some time, but it was the smaller fighter that got in the killer blow. Under the rules of this scenario, if the Golem is killed then both wizards earn no experience whatsoever!

With the primary objective being to study the now destroyed Golem, all that’s left to do is grab as much treasure as possible. This is made harder by the arrival of two wolves behind Lady Katherine’s lines...

...and a snow leopard on my left flank. The marksman is duly dispatched to deal with the creature. By now my opponent has four treasures in their possession whilst I have three.

Time to alter the score a little. While the enemy captain is putting down the wolves, Thaddeus breaks out another mind control spell and, once again empowering it to an unbeatable score, causes the enemy treasure hunter to do a u-turn and bring his treasure to his temporary new master.

The snow leopard gets the better of the marksman, but by now Lady Katherine and co. are quitting the field, leaving to shattered and now worthless remains of the Golem to Thaddeus. The secret runes inscribed on it’s massive body are now lost forever.

Another great game (with some admittedly fluky dice rolling on my part)! Despite gaining no experience due to the Golem’s demise (no doubt Lady Katherine will be having stern words with her ranger), Thaddeus gained the upper hand with four treasures to her three. Treasure rolls were not too bad either. FYI Giles' report is up on his blog here.

So the Hunt for the Golem mini-campaign comes to a premature halt and we look toward the next game, whenever that may be. Neither wizard can rest on their laurels, for something is stirring in the dark and the undead are restless…

CSI: Felstat Starring Thaddeus Daemoncall


The devastation was complete – ripped and twisted bodies lay scattered among the ruins. Limbs, offal and bones festooned the frozen buildings like some grisly red bunting for some snowy winter festival.

Thaddeus Daemoncall frowned. He had followed his nemesis, Lady Katherine, to this place – being able to flit between planes can be useful for spying on your rivals – but the sheer savagery of the attack that had taken place here surprised even this grizzled old Summoner. All instincts told him to flee this noisome scene, yet the desire for knowledge pushed him on.

“We must find out what has transpired here,” he declared, choking back the urge to vomit. “It will not be pleasant – you may need to wear gloves…”

All together now... YEEEEEEEEEEEEEEEEAAAAAAAAAAAAAAHHHHHHHHHHHHHHH!

Time for another head-to-head between my main warband, led by Summoner Thaddeus Daemoncall, and Giles’ Enchanter Lady Katherine. I wanted to try out the Hunt for the Golem mini campaign (if only to buy some time to get more Lich Lord terrain sorted), so it’s time for the Attack Site scenario.

You may recall my last two games with this warband didn’t go too well, but Thaddeus has a few extra spells under his belt now that he’s keen to try out…

My warband heads out to investigate the carnage. Pre game a couple of potions were brewed, a zombie raised and an imp summoned. The band split into three, with the zombie, imp and some soldiers moving up on the left.

In the centre, Oddleigh the apprentice leads another group, making good use of cover. Thaddeus, accompanied by a crossbowman, climbs up onto a ruined building on the far right, giving them a reasonable field of fire whilst providing good cover.

Lady Katherine and her warband face us on the opposite side, also intent on rummaging through the gore. In this scenario, ten corpse markers are placed. Six of these contain treasure, two are actually zombies, one a wounded thug and one an important set of notes, detailing what has transpired.

Thaddeus espies the enemy through the ruins. He’s learned a few new spells, but on this occasion an old-fashioned bone dart is called for. Scratch one warhound.

Lady Katherine has also learned new magic, and teleports to the nearest corpse. Giles rolls on the table and alas, a zombie rises from the pile of body parts.

Thaddeus’ own zombie also has a rummage, and discovers a survivor. Disappointed that it cannot feast, it is compelled to leave the wounded thug alone and shamble onwards. To the zombie’s left, the imp has managed to snag some real treasure.

Lady Katherine’s treasure hunter climbs up a pillar, atop which more body parts hang. Suddenly these body parts snap together and another zombie rises.

Thankfully the zombie is beaten in combat and pushed off the pillar. It survives the fall however and is free to shuffle towards the nearest member of Lady Katherine’s band.

The erstwhile Enchantress defeats the zombie and is free to teleport elsewhere. Meanwhile both warbands are eyeing up the remaining corpses. With the survivor and zombies revealed, all that’s left is treasure and the notes.

A bear! Where? There! Thaddeus’ captain Red Sandra and knight Sir Pierre are clanking forward along the right flank when a bear suddenly charges at them. Note the nearby treasure, which turned out to be illusionary fool’s gold.

Nifty Halfinch the thief glugs down his invisibility potion before shinning up a gorily decorated pillar. Being invisible means he won’t be such an obvious target when he reaches the top.

Oddleigh reaches the survivor and heals him, thus bringing him temporarily into the team. The thug is sent forward to join the infantrymen, warhound and newly-hired marksman to shore up the centre. In the bottom left if the photo, the summoned imp is dragging a treasure chest towards the board edge.

Halfinch waits a turn for an opportune moment to investigate, nabs the treasure and climbs back down the pillar before anyone realises he’s become visible again. By now most of the treasure is accounted for, leaving just the notes, which Thaddeus’ barbarian is soon stuffing into his loincloth.

Lady Katherine’s captain is as tanky as ever (albeit less orange), and leads his men in an attack. Warhound and infantryman go down as they try to keep the opposition from stealing the notes from the barbarian behind them.

Red Sandra the captain goes down under the weight of the bear’s claws. Sir Pierre the knight readies himself to face the ursine onslaught, but Thaddeus has other ideas.

A mind control spell, empowered with extra health, causes the bear to cease it’s attack and join the ranks of Thaddeus’ band. It lumbers forward towards Lady Katherine’s men followed by the surprised knight.

As the newly recruited thug races to assist, the last infantryman is bested by the captain. To make matters worse, Lady Katherine’s apprentice casts a wall spell behind the barbarian, cutting off any line of retreat.

The enemy close in on the barbarian. He readies his weapon and prepares to face the oncoming battle with a savage relish typical of his kind. He swings his mighty sword…

One assailant is slain! The other evades the barbarian’s blows but is pushed back, giving the defender a little breathing space. With one hand gripping his mighty sword he thrusts the other down his loincloth. Secreted within is a little something in case of emergency…

Meanwhile Thaddeus’ treasure hunter Goldtooth is lugging off treasure. He nearly makes it to safety when an angry wild boar trots into view and charges.

On the other flank the mind controlled bear joins the rogue zombie in attacking an enemy soldier. Those of Lady Katherine’s band that are not fighting the barbarian or the zombie are beginning to pull back.

‘POOF!’ the barbarian takes a swig from the potion hidden in his loincloth and disappears! Thanks to a little breathing space and a teleport potion he is free from harm and able to stroll off the board with the notes.

Bear and zombie dispatch the treasure hunter. The zombie turns on a supporting ranger, allowing the bear to press forward against the withdrawing opponents. Thaddeus leaps his knight further forward to keep up the pressure.

The treasure hunter vs. boar encounter is not going well, with the treasure hunter getting wounded. Thankfully Oddleigh is racing to the scene with a leap spell to get his comrade out of trouble. The boar is then finished off by the crossbowman.

Lady Katherine teleports to another treasure, attracting the attention of two wolves. Before they can get up to her level, she promptly teleports away, leaving them to catch the scent of more prey.

The bear catches up with a wounded, treasure-laden archer. Behind the archer, Lady Katherine has appeared next to her apprentice. In his eyrie, Thaddeus can just about make out the flash of orange robes and, guessing the pair are together, sends an elemental ball in their direction. Both catch the blast, but their robes are flameproof and no damage is done.

The zombie and marksman, who were moving along the left flank to put more pressure on the opposing warband, stop to engage the wolves.

The zombie, acting as a (rotting) meat shield, is savaged by tooth and claw, leaving the marksman to fend off the attack.

Lady Katherine’s men race to rescue their stricken comrade and dispatch the mind controlled bear. This frees up Thaddeus to cast it once again on the captain, again empowering it to unshakeable levels by using up his precious orb of power.

Will the thus controlled captain carve a trail through his former comrades? No. Lady Katherine dispels the effect, allowing said captain to return to the fold and batter Thaddeus’ knight.

Marksman and rescued thug see off the wolves. Like is fellow crossbowman, the marksman’s fire is causing little damage throughout the game, but he is suitably useful in close combat.

The opposing ranger finally manages to beat the zombie – a creature that's tenaciously hung on throughout the game and has tied up Lady Katherine’s soldiers for several turns.

And so the game ended with Thaddeus in possession of the field, and more importantly three treasure tokens and the mysterious notes. Lady Katherine took four treasures (including a revealed secret) so honours were pretty much even.

Reading them it became apparent that the creature that had caused this devastation was a sentient granite golem: a giant stone creature seething with rage. Thaddeus knew that he could not suffer such a dangerous beast to live, but perhaps it could be studied  a little before it was killed…?

Another great game with my mate! The Dice Gods were kinder to me this time around, and I was lucky to have given my barbarian that teleportation potion before the game, else he would have been cut off and destroyed. Most of the warband survived their post-game injury rolls, but the couple that did not were easily replaced thanks to the treasure I earned (though no replacement power orb sadly).

Giles' batrep is in two parts - here and here. He has a great blog, so please check it out!

Wednesday 22 February 2017

Desecrating Graves on a Club Night


The guys at the Hereford Wargames Club had asked me to put on another game of Frostgrave, so last night I duly obliged.

I thought it’d be interesting to play the Mausoleum scenario – the mausoleum being represented by a 6”x6” graveyard (I wanted an excuse to use my new Dark Ops scenery) with 4 special treasures placed around it. Each player (Alan, Steve, Ted and myself) then placed 2 ordinary treasures.

With my opponents each fielding a new level 0 warband, I decided to play with my level 1 illusionist, Miss Mazement, in a change from my usual wizards from the darker end of the spellcasting spectrum. Happily she got off to a good start, managing to cast reveal secret before the game. This was duly picked up by thug in the first turn.

Each player deploys at an edge. With wizards either side of me I concentrate on the flanks, leaving the centre open. Mazement’s first act is to cast a beauty spell on herself. I roll a 19 and empower it with 5 precious health points, making it difficult to resist.

We all move in. My archer, atop a corner ruin, fires ineffectively at Alan’s warband (led by one Hashpot Dribbleweed) on my left and my thugs advance to menace Ted’s band on my right. However, as is becoming the norm, treasure is grabbed, attracting wandering creatures, in this case a four pack of rats, which appear perilously near my wizard.

My thugette tries to dislodge one of Ted’s crossbowmen. She manages to wound him and pushes him back. Gripping his toes he teeters on the edge of the ruin. On my left, my man-at-arms tries to trouble Alan’s flank.

Alan and Steve’s warband are warily advancing towards the treasure, and each other, when the rusty squeals of the cemetery gates heralds the arrival of a skeleton.

My warhound races from my right flank to keep the rats away from my wizard, leaving her free to move away. Will the little critters outnumber the pooch?

Another skeleton climbs out of the graveyard. My warband is moving forward towards the treasure and trying not to get killed by the other wizards. Luckily Alan and Steve are busy fighting among themselves, whilst Ted’s spellcasters are too busy fluffing their spells.

Ted does however send a thug up to deal with my thugette. He wins the combat and she takes damage, but to make matters worse he then pushes her back and off the roof edge, causing her to take more damage from the fall.

In a dark and dingy alleyway my man-at-arms’ flanking move is halted by two of Alan’s men. Above them, another minion is climbing up a ruin to deal with my archer.

Steve’s barbarian dispatches Alan’s bear, hoping to beat Alan’s zombie to the treasure. A wandering skeleton also rattles into view, wondering what the fuss is all about.

My wizard casts a wall of fog to keep my dwarf thief out of sight from any nasties as he advances into the centre. So far I’ve managed to nab the revealed treasure, but nothing else – time to pull my finger out!

On my right, my apprentice watches in horror as Ted’s apprentice blasts my thug with an elemental bolt. He is forced to drop the treasure he has just picked up, on account of being dead.

Steve screens his minions with fog, causing the skeleton to go for Alan’s zombie. After some exciting undead-on-undead action, the zombie prevails.

Having munched it’s way through two of the rats, my warhound finally succumbs to the scratchy little buggers. Luckily I have no-one else in sight, so they head for Alan’s men.

Steve is unlucky. A wandering monster is generated, causing a wraith to appear right behind his lines. With no magical weapons to deal with it, he is forced to screen it off with fog in the hope that it’ll wander somewhere else. Alas a random direction roll brings it hovering right next to his apprentice.

If that wasn’t bad enough, two wild dogs also appear behind him and head for the nearest food source – yep, his apprentice. Sadly she cannot withstand this combined ghost/canine onslaught.

By now Alan and Ted are concentrating their energies against Steve, allowing me to advance into the graveyard relatively unmolested. I use a combination of fog and invisibility to keep any wandering skeletons from attacking my troops.

The hour is late and it is not wise to linger in such a place after dark, so my apprentice renders himself invisible and joins his fellows in lugging away treasure. The other warbands are making their final treasure-grabbing moves and then we call it a night.

Yet another fun game at the club - as it inevitably is when 4 warbands cram onto a 3'x3' board - and quite a successful one for my wizard, who claimed two ordinary and two special treasures, yielding plenty of XP and some nice goodies in the treasure rolls. Alas I lost a sizeable chunk of her warband, but there was enough gold to cover the cost of replacements.

It was also nice to play a less ‘evil’ wizard for a change, casting spells I haven’t used before. Thanks guys for a great evening!

Monday 20 February 2017

Wreck the Casbah


To look at, the Casbah was just like any other Trow: ungainly and unglamorous cargo ships that plied the Meregile River, ferrying basic goods between the great magical city and the various coastal settlements and outlying islands that served it.

Only a very keen nautical eye indeed could see through the plain, weather-worn planking and ragged, oft-repaired sails to the reinforced bracing, hidden weapon racks and sleek hull structure below the waterline…

Captain Harkul watched as another vessel passed by, it’s helmsman hailing the Casbah like one tradesman to another. Harkul returned the salute, satisfied that once again he had slipped past the outer forts and their inspectors, and could safely drop anchor and get rid of yet another consignment of unsavoury cargo.

“Here they come Cap’n!”

Harkul turned, scanning the river bank as a group of robed individuals rowed a small boat towards them. He didn’t trust these fanatics, for he was sure that’s what they were. Certainly they paid well – very well – but his instincts told him that whatever magical contraband was that he had collected from the strange oriental junk he had rendezvoused with some miles out to sea that morning, it didn’t bode well.

Still, no doubt the authorities would cotton on eventually – they always did in the end – and by that time he would be long gone, lying low somewhere further south with a sackful of gold until everything sorted itself out.

“Heave to and lower the ladder then!” he hissed. “Let’s get this done - I don’t like how the sky is bruising...”

He watched as his surly crew went to work.

“And be quick about it, lest I drink all that rum that’ll-“

Somewhere deep within the centre of Felstad there was a loud ‘crump’ and everything went white…

And cold… very, very cold…


With the Thaw of the Lich Lord scenarios looming on the horizon I need to look at some of the more problematic terrain required, including the shipwrecks for the Battle on the River scenario.

Not being willing to buy model ships just for one scenario, I decided to scratchbuild some bits. I’m not an expert shipbuilder by any means, so hit on the idea of making a wreck in sections so that it could be spread out across the board.

I also decided to make it look like the river had frozen around the ship above the waterline, meaning that I only had to do the decking and such.


The decking is made from plasticard, scored along with a saw to give the impression of planking. The uprights are cut off bits of MDF, while the wooden slats along the hull are strips of cardboard. The rest are just bits scavenged from the bin.

I’m very happy with this, and will no doubt make a few more bits to scatter around the river.

Monday 13 February 2017

Nullmen Proxies


I’ve been wracking my brains trying to figure out proxies for the Nullmen; the protagonists in the Pits of Null scenario from the Sellsword expansion.

Now, Sellsword states that Nullmen are strange beings resistant to magic, nearly featureless humanoids that glow with an unearthly grey light.

My first thought was to use alien Greys, of which there are many manufacturers. However looking at the scenario, you need a whole bunch of Nullmen (starting the game with four, with another spawning each turn). Do I really want to fork out for loads of Greys (and do all the conversion work to make them look less sci-fi) for just one scenario?

So I have decided on a cheaper approach – Null Shadow men! These are simply two-dimensional versions of the Nullmen – shadow figures of pure null anti-magic.

I did a search for 2D paper figures and found a suitably monstrous looking chap from a superheroes page. I then turned this into a black silhouette and tweaked each one by adding various lumps and rough facial features in MS Paint.

I can now resize these to 28mm-ish size and either print them out onto card or possibly ask someone to be kind enough to laser cut them or somesuch. I reckon 2 lots (i.e. 10 figures) should do the trick.

Having taken the original shape off the internet, I claim no ownership or copyright of these, so I won’t complain if you want to use them!

Friday 10 February 2017

Do You Dig Graves?

"Yeah, they're alright..."


Sorry.

Finished off painting the last bits from my Dark Ops Terrain order - this very nice graveyard set.


Some great pieces in this set. In addition to some crumbling walls we there are two large wall and gate pieces which butt together to make a whole. The gates are designed to actually swing on the hinges - pretty neat!


There are also lots of gravestones, crosses, a couple of tombs and a large cross/angel wings combo, all in glorious MDF. The detailing is very good, especially on the gates - worth checking out if you want to add some inexpensive spookiness to your tabletop.


Thursday 9 February 2017

Two-Headed Trolls and How to Shoot Them


Here’s the last mini from my recent batch of Reaper Bones goodness: an Ettin which I will use as a two-headed troll (see the bestiary in ‘Into the Breeding Pits’)

Someone on the Frostgrave Facebook page recently asked me how I do my photos, so I thought I’d vaguely detail the process here.

Software used:
MS Paint – usually bundled in with all versions of Windows
Picasa – a great photo editing tool which sadly is no longer available
Windows Live Photo Gallery – again bundled in with Windows Essentials and again, no longer supported
GIMP – a very useful photo editing program

Step 1: Make a graduated background (you only need to do this once)


For this, make a blank ‘picture’ in MS Paint or something similar – literally a blank white rectangle the same size as what you want your finished article to be.
Save it and then open it in Picasa Photo Viewer and then select Edit in Picasa. Note Picasa is no longer supported so you might have to find a similar program to do this.


Select the third tab along and click Graduated Tint. Choose your colour and fiddle with the settings until you get the effect you want.
Save this picture as your main background.

You might be able to find a nice background picture on the internet if you don’t want to bother with all of the above!

Step 2: Take photos of your model


There are loads of guides on the internet about photographing miniatures. Below is a link to one from Annie of Bad SquiddoGames, if only because she’s awesome and it’s an excuse to link to her new website.


By necessity I have to take my photos indoors, under fluorescent light. FYI I use my iPhone camera (again there are loads of iPhone photography guides online).
Take the photos in front of a blank background, a curved sheet of white card for example. Or you could knock up a rough and ready light box like mine (made from a metal file box lined with paper).


Make sure that your camera is focusing on the model. If need be take plenty of shots and choose the best ones.

Step 3: Put the photos onto your computer

This will depend on what you used to take the photos and what device you are using to edit them.

Step 4: Crop the photo


Once again I use Picassa for this, but you could just as easily use MS Paint or a host of other photo editing programs and apps.


Crop the photo so that the model is roughly in the centre. Leave a reasonable amount of blank space around the model so that it’s not ‘in your face’. Save the photo.

Step 5: Resize the photo


Resize the photo to the same size as your background photo (see step 1). It doesn’t have to be exactly the same size, just somewhere near.
For lots of photos I use Windows Live Photo Gallery, as I can batch resize multiple photos with this (though it does save them as separate files rather than overwriting the originals).

Step 6: Select the model

Open the photo in GIMP. You need to select (or ‘cut around’) the model. I do this in several stages:

1 – Roughly select around the model using the Free Select ‘lasso’ tool. This ensures that most of the background shadows and such are cut out. It's difficult to see in the photo, but I've basically used the lasso tool to draw a shape around the model.


2 – Click ‘Select’ menu and then ‘Invert’.
3 – Use the Fuzzy Select ‘magic wand’ tool to select around the model. Change the settings (feathering etc.) to suit. Make sure the ‘Add to Current Selection’ option is on.
It's difficult to see in the photo, but I've clicked the magic wand tool on all the unselected bits of background around the model.


Keep using the magic wand tool until there’s a shimmering line tight around the model (this includes gaps between legs etc.)
4 - Click ‘Select’ and then ‘Invert’.

All being well you should have only the model selected and no bits of background.

Step 7: Fiddle with the model


With the model selected you can now fiddle with it to make it look better.
You can adjust the lightness and contrast (under the ‘Colors’ menu), sharpen the image (Filters – Enhance – Sharpen) and generally titivate it until you think it looks right.
There are plenty of GIMP tutorials online.

Step 8: Copy and paste the model onto the background


On your selected model, click ‘Edit’ and then ‘Copy’.
Then open your background photo and select ‘Edit’ and ‘Paste’.
Use the ‘Move’ tool and ‘Scale’ tool to move and resize the model as you see fit.

Step 9: Save the finished product

That’s it!

Now got to ‘File’ and ‘Export’ to save your nifty new photo. Upload to a good image hosting service (I use Photobucket) and then copy the associated URL to link to your blog/forum thread.


Wednesday 8 February 2017

The Bird is the Word


Finally, a crow for my crow master!

Lead-Adventure Forum member GDonk very kindly sent me a spare model from the Zombicide ‘Murder of Crowz’ expansion.


Each model in this expansion consists of a flock of six crows in flight. GDonk figured I might be able to detach one, which I duly did (choosing the easiest one to snip off).

Stick a curved bit of wire up it’s bum and hey presto, one Blood Crow, ready to flap around the frozen city!

Thursday 2 February 2017

Forgotten Treasure


So I've made a very small inroad into my Forgotten Pacts Nickstarter stuff in the shape of these treasure tokens. Very simple paintjobs but I'm happy with 'em.

Wednesday 1 February 2017

The Thin Dead Line


In an ancient graveyard, deep in the heart of the frozen city, unholy creatures stalk through the miasma…

“Braaaiinss… Braaiinsss…”

“Not today thanks, I’m watching my figure.”

“Braaii- oh hello Steve, I didn’t recognise you for a minute. My you’ve lost weight!”

“Well you know how it is: after spending all day fighting warbands all you want to do is slob out in front of the gravestone with a bucket of brains – next thing you know it’s an effort to get out of your tomb every morning. So I decided to do something about it.”

“Whatever you’re doing, it’s working!”

“It’s nothing special; just sticking to less fatty foods – lower limbs and such, cut out the  snacking on Hobbits and going for a good shamble twice a day...”


With the main rulebook scenarios finished and Thaw of the Lich Lord on the horizon, I was looking for an inexpensive zombie troll figure when I found a set of plastic Dungeon Saga undead miniatures. “Great,” I thought, “a zombie troll with some extra undead minions to boot!”

I was rather disappointed then to find that the minis, whilst nicely detailed, are quite under-scaled compared to the usual 28mm fare. They can best be described as ‘slight’ – they’re on 25mm square bases, which should give you an idea of how skinny they are.

As such I haven’t really gone to town on the paintjobs (I confess to a little photo manipulation to make them pop a bit), but they’ll do if I need to throw any extra nasties onto the table.